Auto Bid widget: start automatic bidding
Launch automated bidding on Upwork search results – hands-off bidding while you focus on other work.
The Auto Bid widget takes Upwex automation to the next level. Instead of clicking into each job manually, Auto Bid scans the current Upwork search results, evaluates each job against your rules, and submits proposals automatically on matching ones.
Where to find it
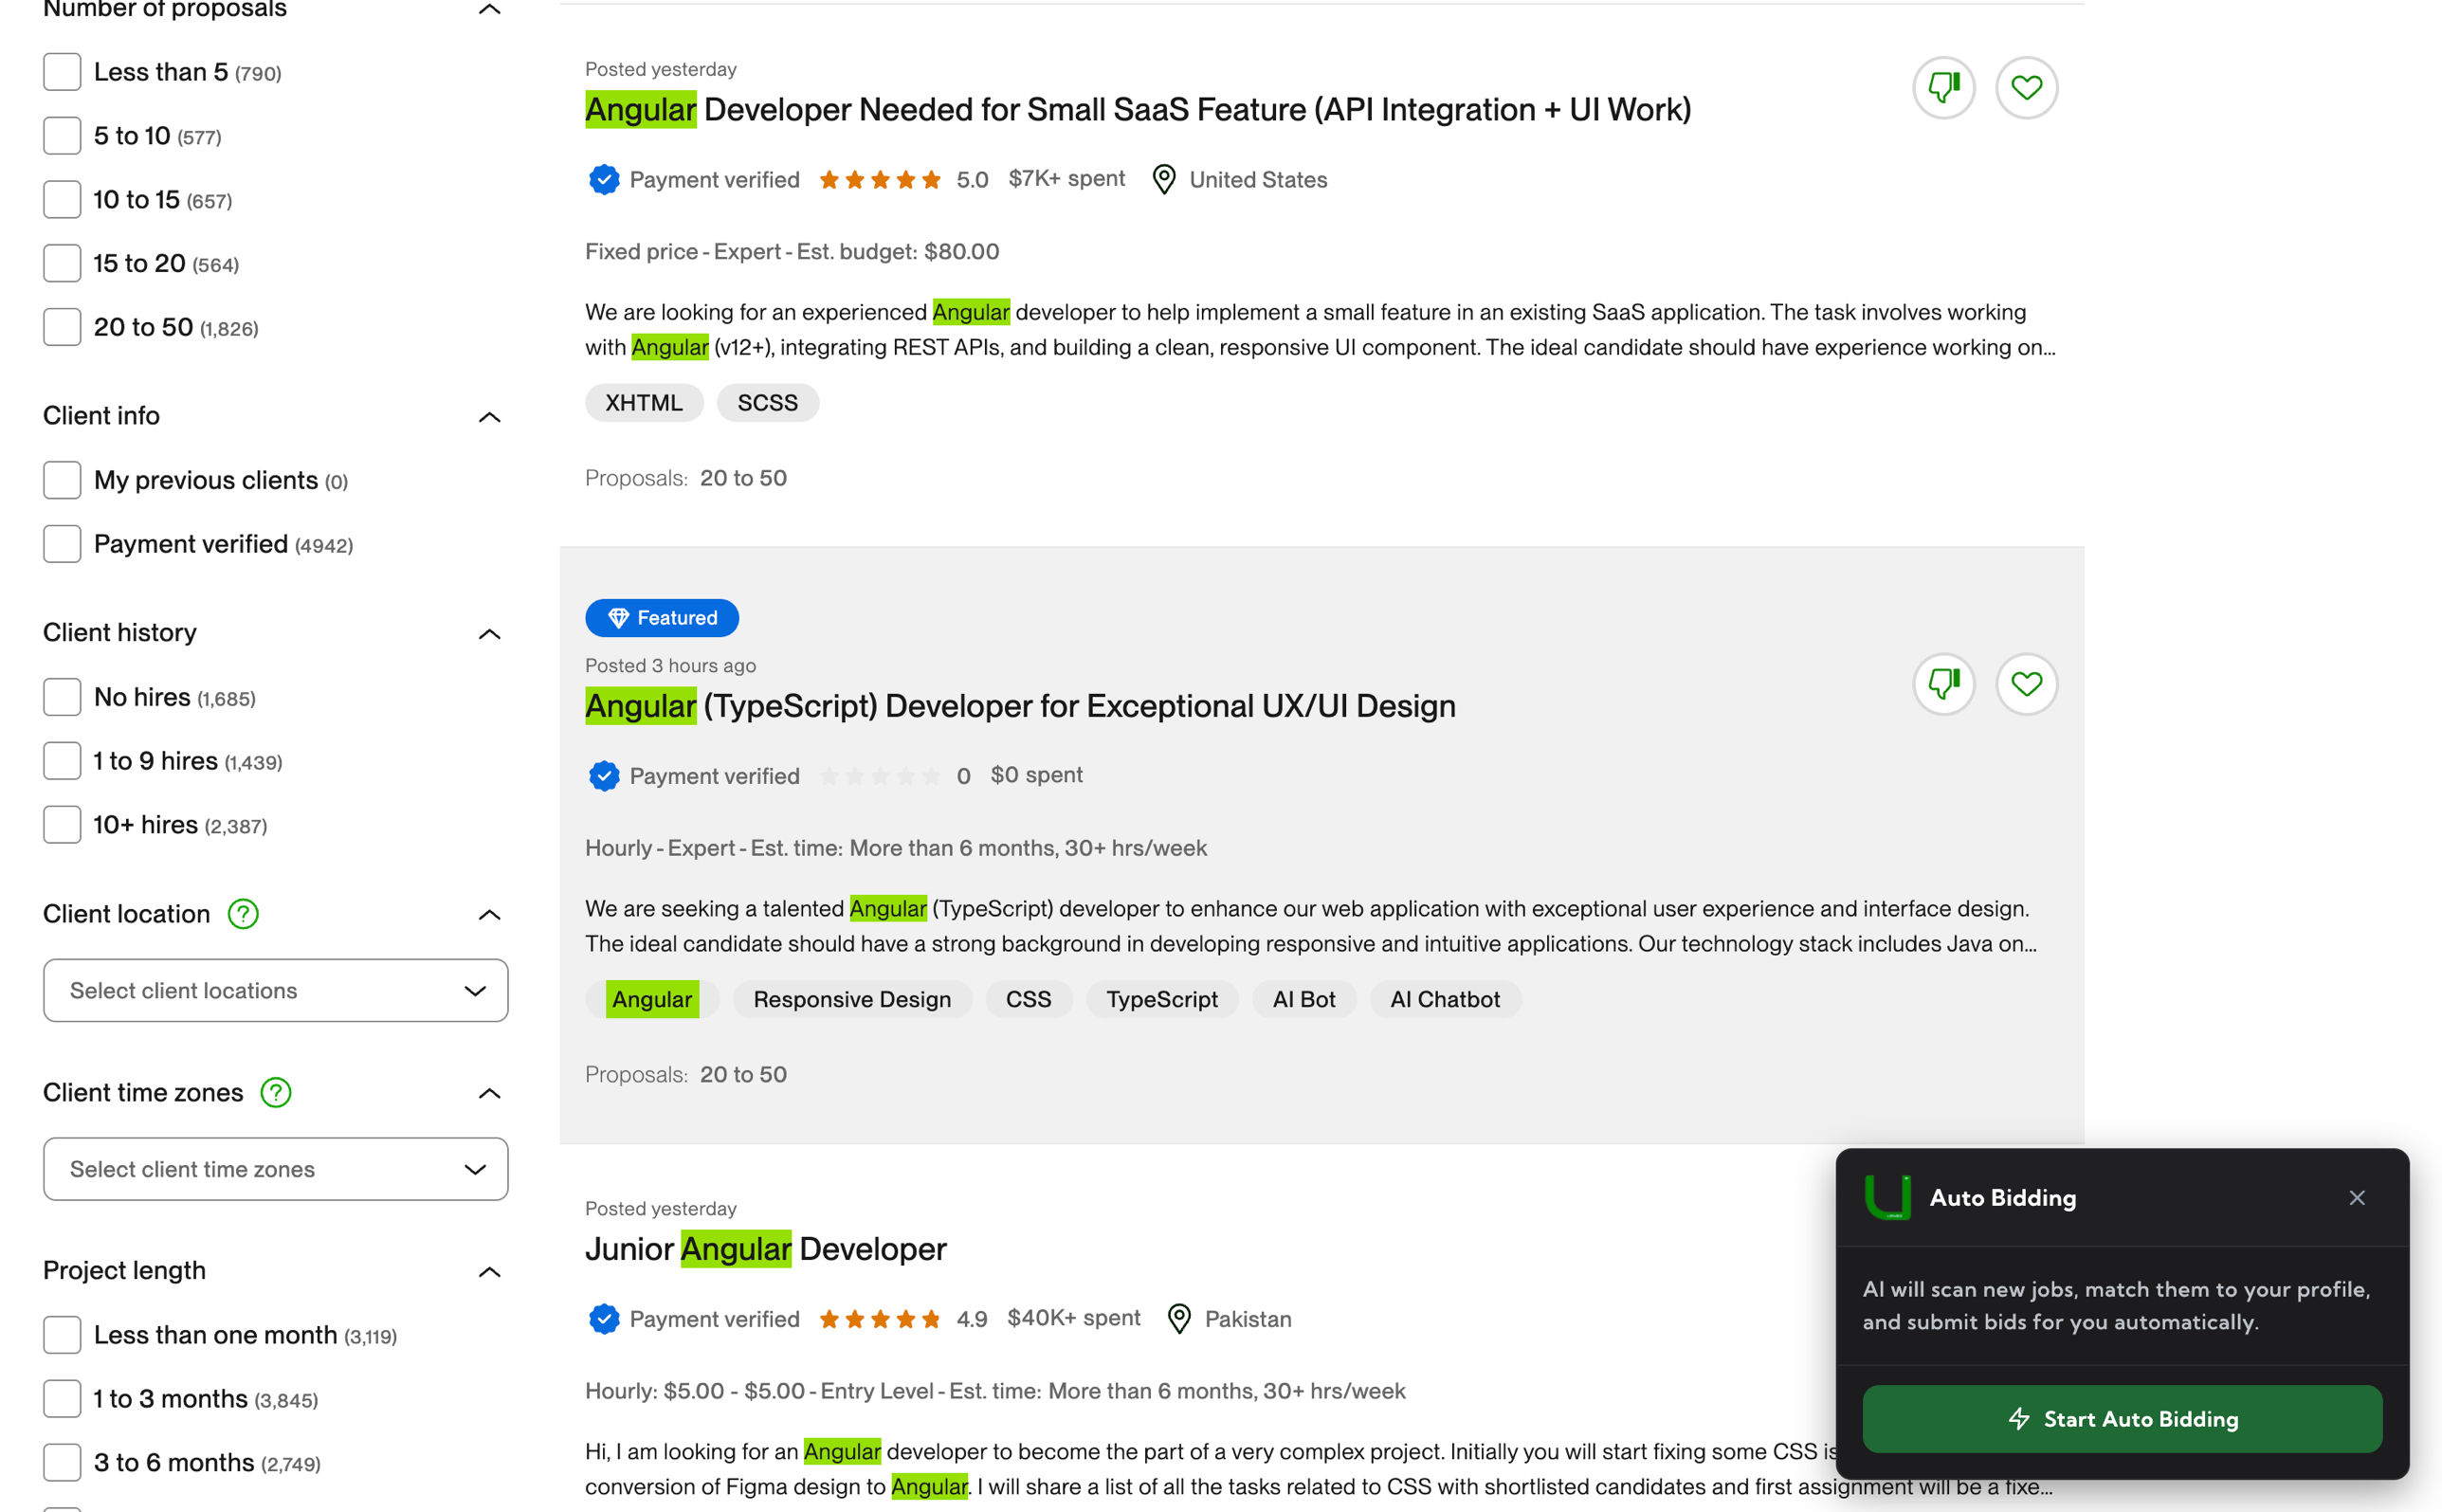
Open any Upwork job search page – upwork.com/nx/search/jobs. In the bottom-right corner you’ll see the Auto Bid floating widget with a Start Auto Bidding button.
The setup flow
Step 1 – Click Start Auto Bidding
The widget loads your active profile, default cover letter template and saved auto-bid rules and switches to the Review Settings screen.
Step 2 – Review settings
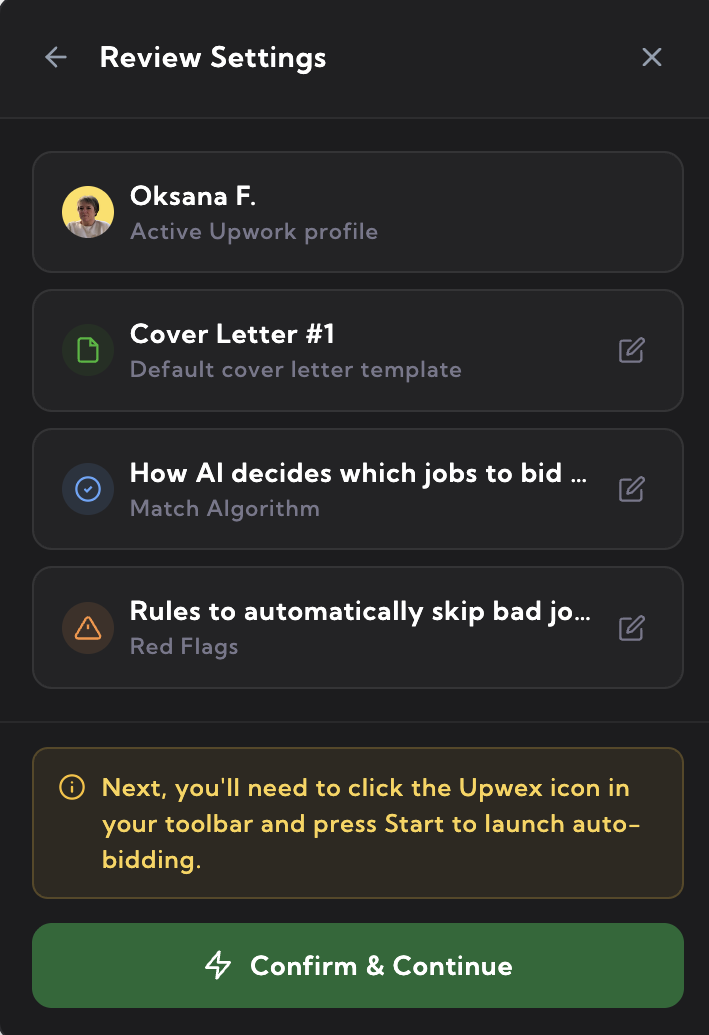
Nothing is picked here – every value is read-only. The screen shows four cards so you can verify what auto-bidding will use:
- Active Upwork profile – the profile that’s currently set as active in your account (avatar + username). To use a different profile, switch the active one from the Upwex popup or Team page first.
- Default cover letter template – the template marked as DEFAULT on the Cover Letters page. Click the pencil icon to edit it in
account.upwex.io/settings. - Match Algorithm – the rules AI uses to decide which jobs to bid on. Edit in settings.
- Red Flags – the rules that automatically skip bad jobs. Edit in settings.
A note at the bottom tells you that the next step requires a single click in the Upwex extension popup, then there’s the Confirm & Continue button. If you opened settings to edit anything, the button changes to Refresh & Continue so the widget pulls fresh data before launching.
Step 3 – Confirm & Continue
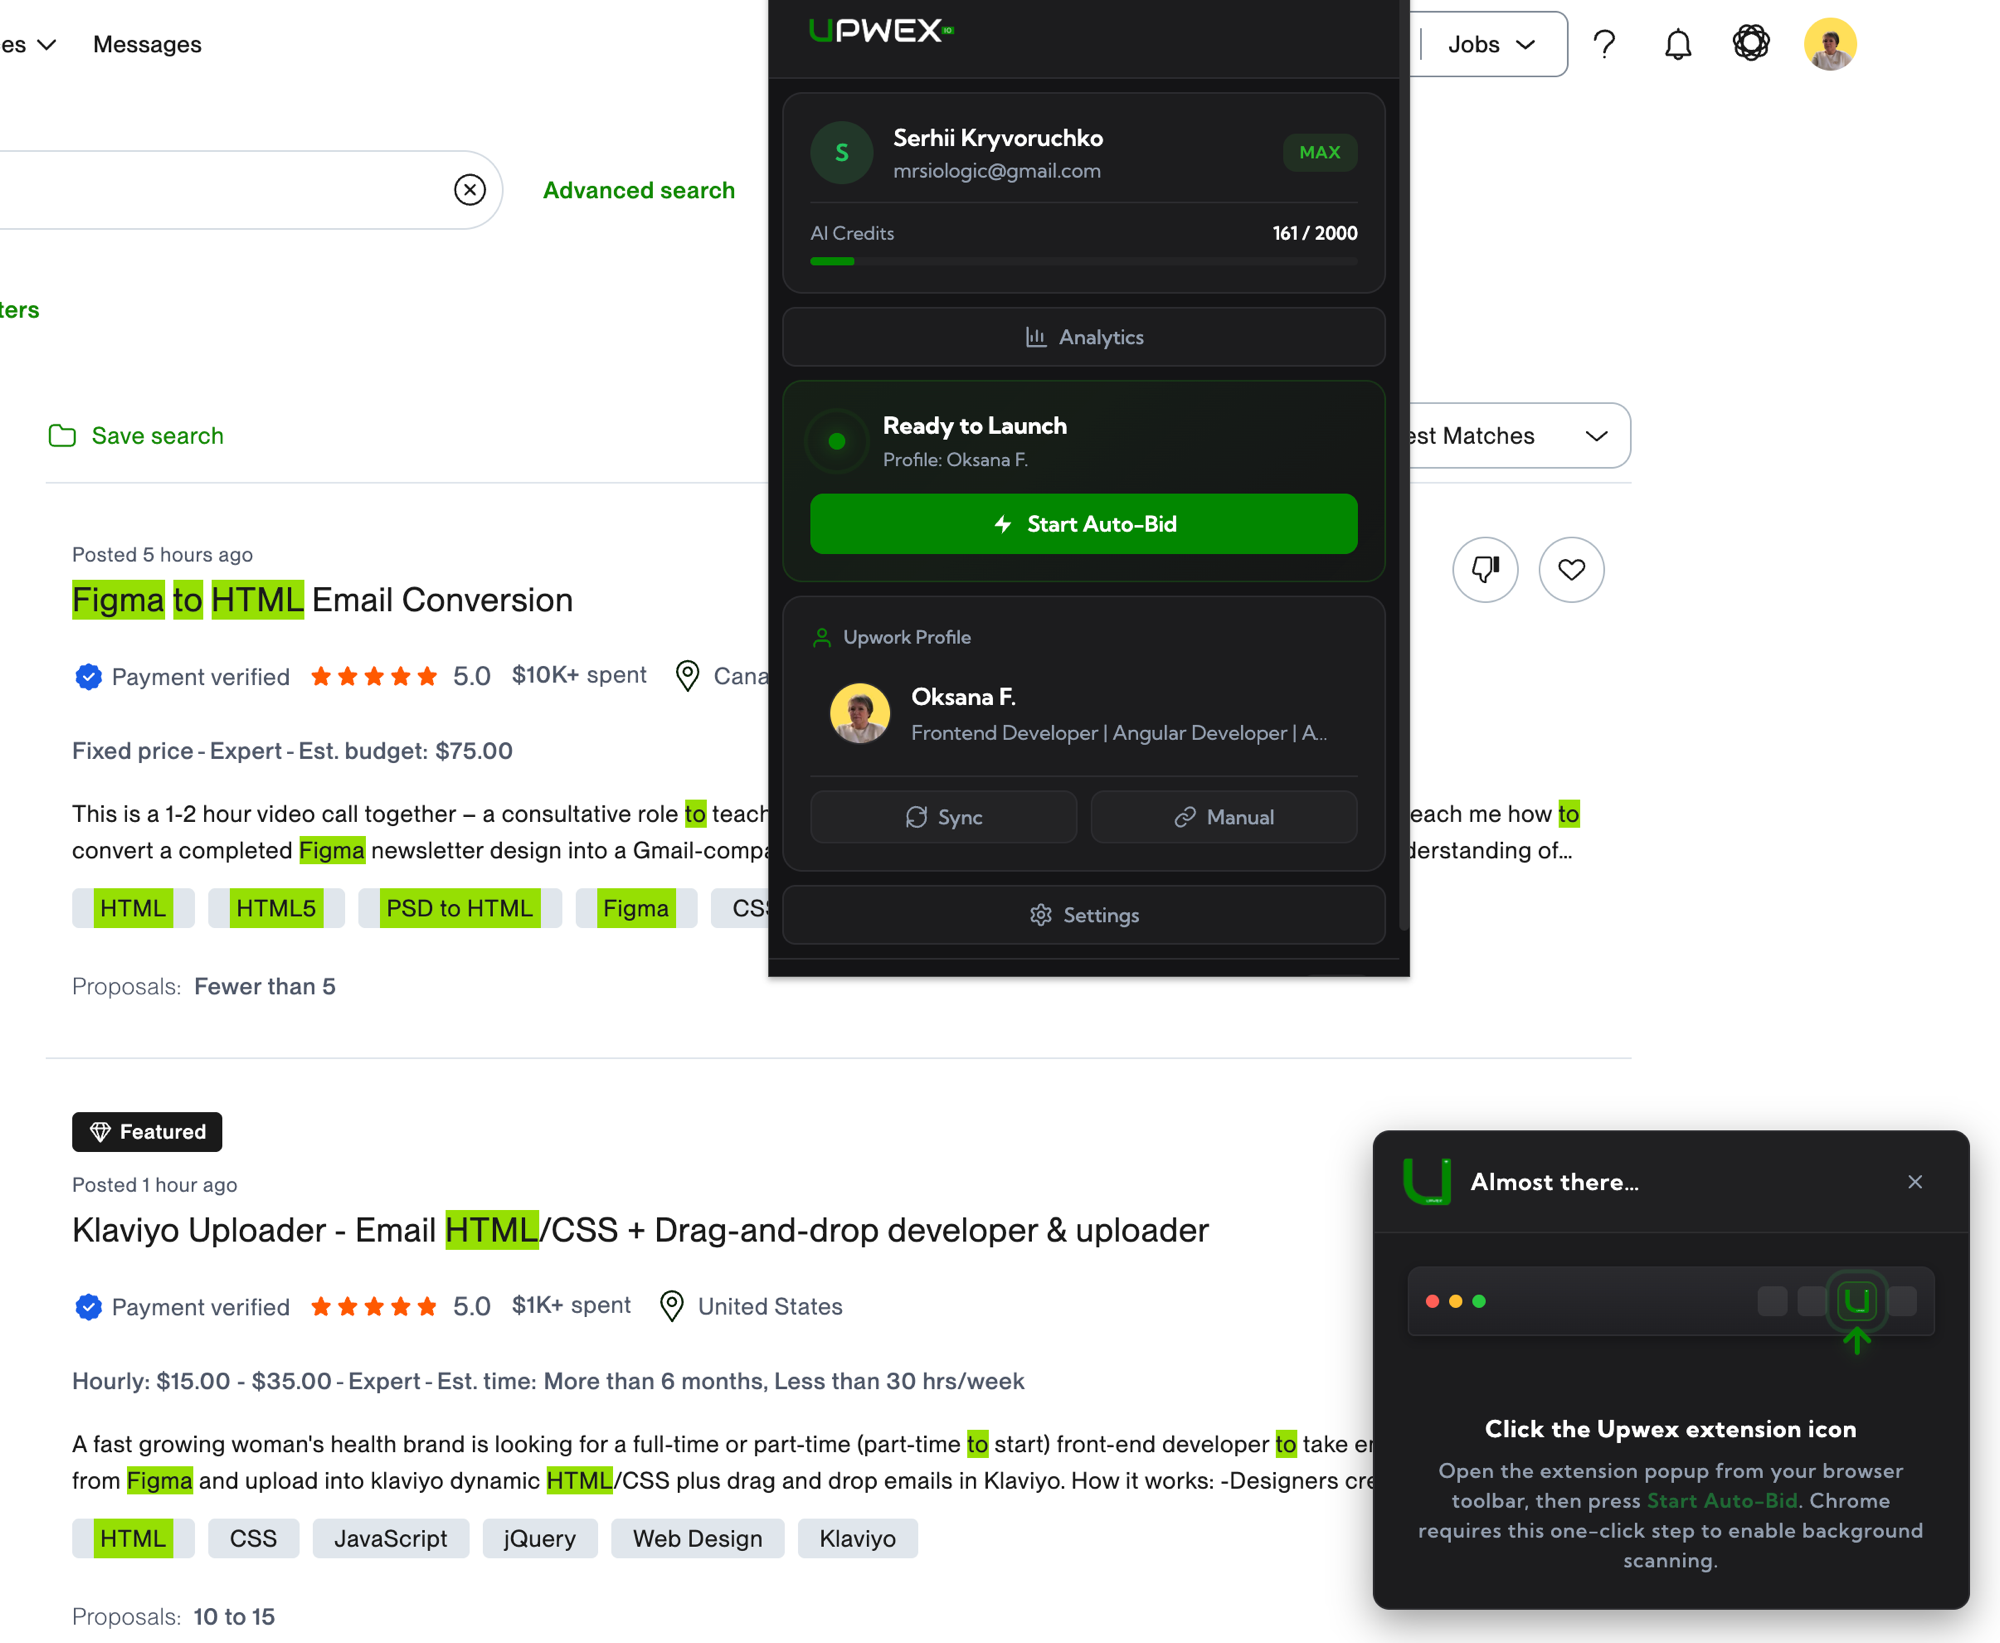
Click Confirm & Continue. The widget switches to the Almost there… screen with a small browser-toolbar illustration and an animated arrow pointing up at where the Upwex extension icon lives in your browser toolbar.
Step 4 – Click the Upwex extension icon in your browser toolbar
This one-click step is required by Chrome – it grants Upwex the permission needed to attach a tab capture keepalive to the search tab. That keepalive is what lets Auto Bid scan in the background even when you switch to other windows or apps without Chrome throttling the tab.
Click the Upwex extension icon at the top of your browser to open the popup.
Step 5 – Press Start Auto-Bid in the popup
The popup shows a Ready to Launch hero card at the top with a small pulsing indicator, the title Ready to Launch, the active profile name underneath, and a green Start Auto-Bid button. Click it.
The popup closes automatically and scanning starts inside the search tab. If something didn’t pick up – e.g. the search tab was closed in the meantime – the hero card stays hidden and you’ll need to start the widget flow again.
Step 6 – Running
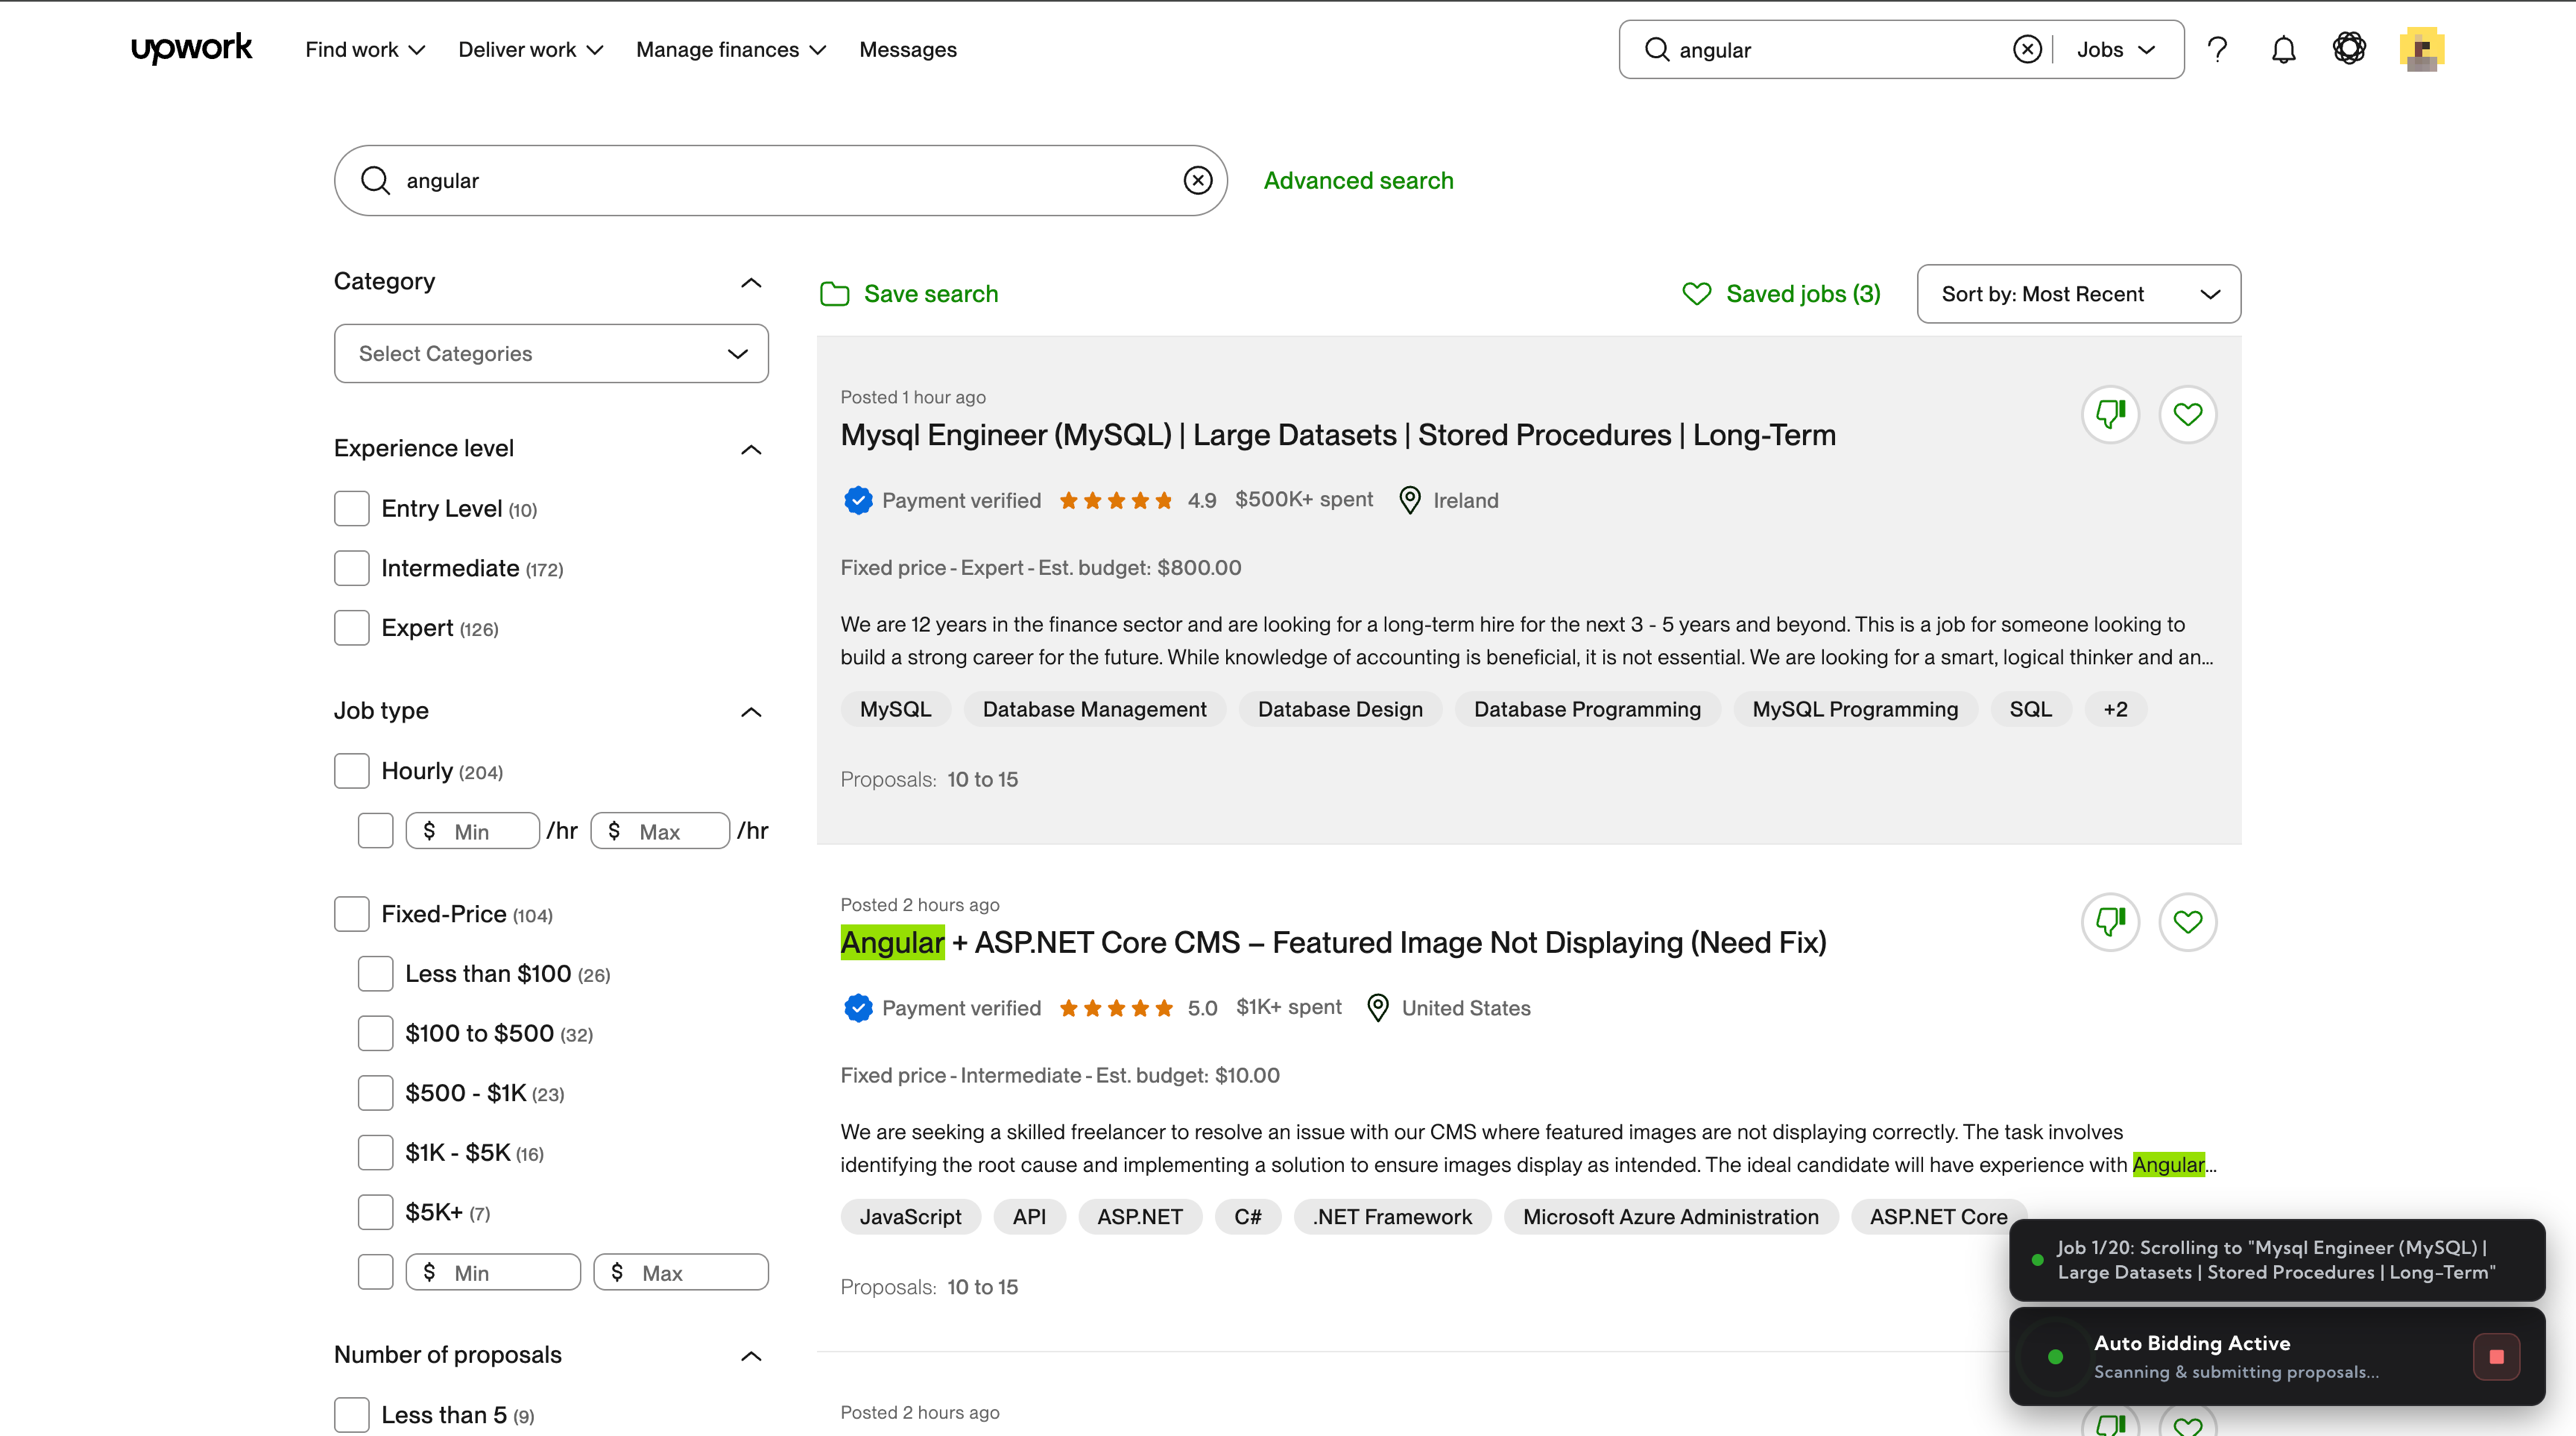
The widget transitions to a compact Auto Bidding Active status bar with a green pulse indicator and a red Stop button. A log widget appears alongside it streaming real-time progress: “Checking job 3/50: HTML Email Footer”, “AI matched – opening proposal”, “Proposal submitted!”, etc.
The scanning runs inside the same tab. Thanks to the tab capture keepalive, you can switch to other tabs, other windows or other applications and Auto Bid keeps running with full JavaScript reactivity – no throttling, no pauses, no need to keep the tab focused.
What happens during Auto Bid
- Upwex reads the current search results page (all jobs visible in the list)
- For each job: opens the detail slider, extracts job data, runs Match Score analysis
- If the job passes your configured filters (see Set up Auto Bid rules), AI generates the cover letter + answers
- The proposal page opens in a new tab in the same window; the proposal is filled in and submitted automatically
- The proposal tab closes and Upwex moves to the next job, with a small randomized delay in between
Between scan cycles Upwex pauses for a few minutes (your Scan Interval), then reloads the search page to pull fresh listings and continues.
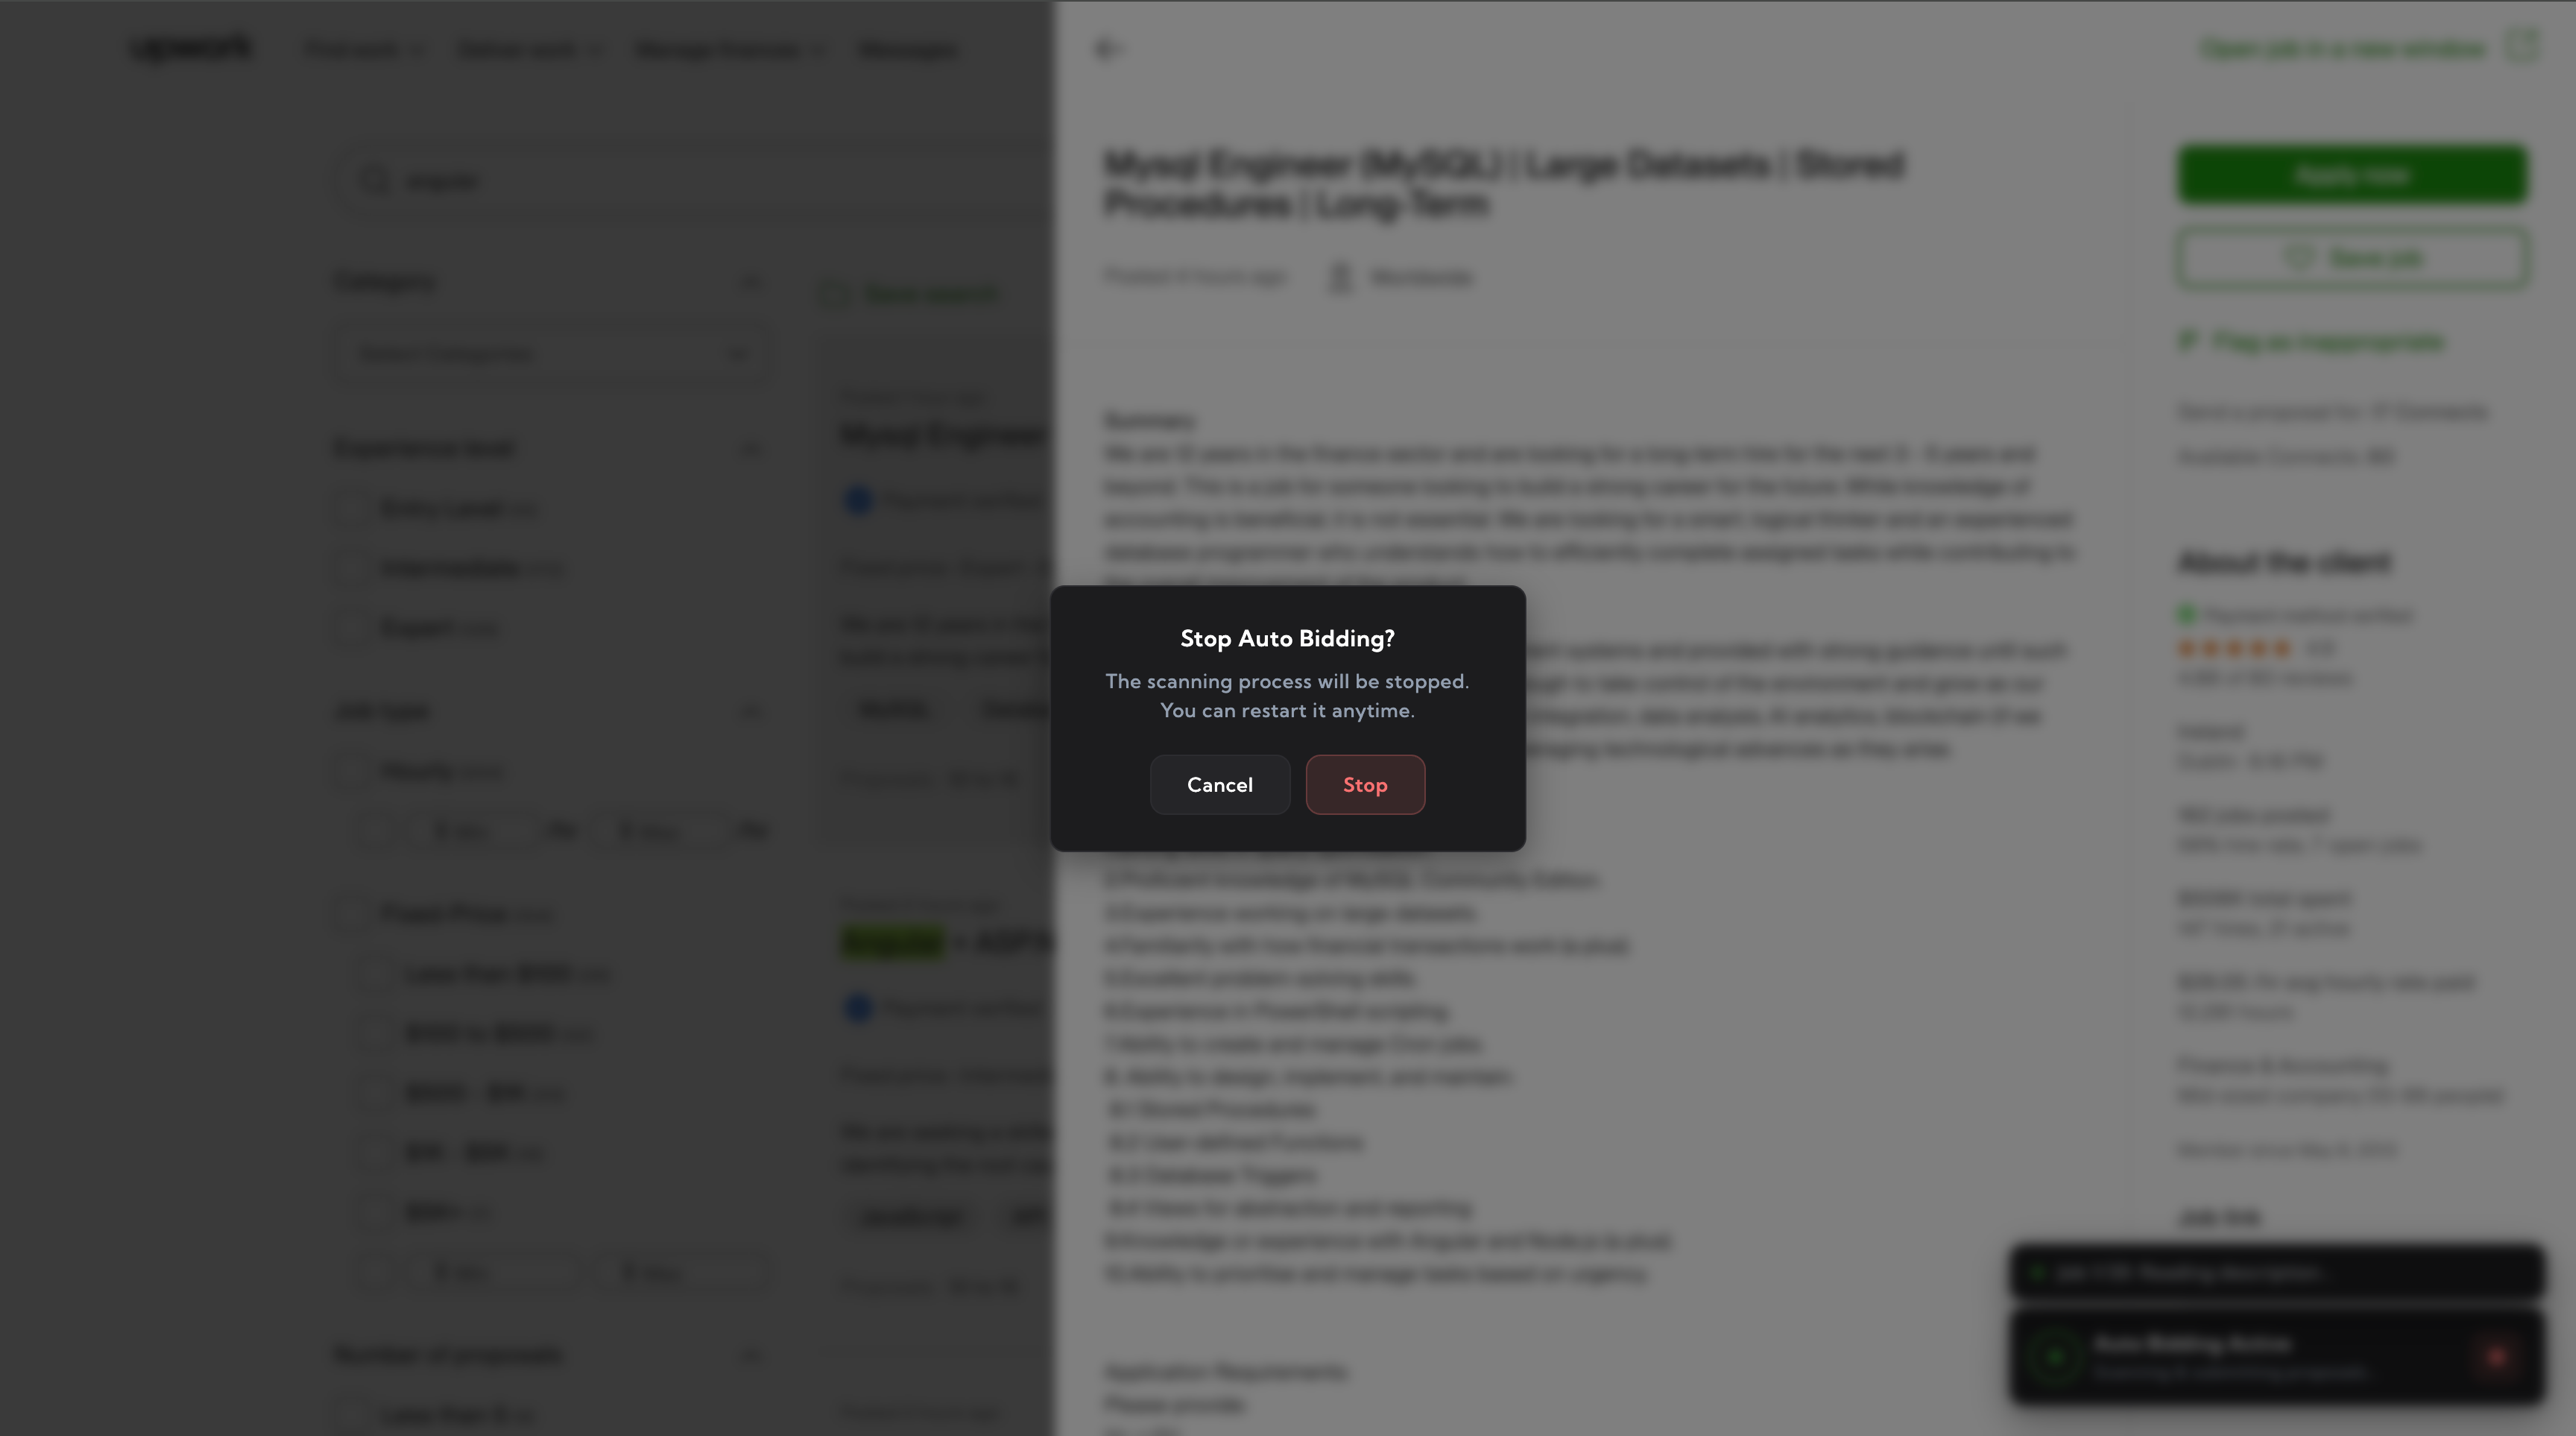
Stopping Auto Bid
Click the red Stop button at any time. A confirmation modal asks you to confirm – Auto Bid will finish the current job (to avoid leaving it in a half-submitted state) and then stop cleanly. Running a new Auto Bid session requires going through the setup wizard again, including pressing Start Auto-Bid in the popup once more (Chrome refreshes that permission per session).
Credits and limits
Each submitted proposal consumes credits like a manual submission (1 cover letter + 1 answers = 2 credits per job). Auto Bid respects your plan’s monthly limits and will stop if you run out of credits, connects or hit Upwork’s rate limits.