Your billing information is the data Stripe puts on every invoice and receipt: your full legal name (or company name if you bill as a business), country, address, and – if you’re a B2B customer in a region with VAT – your Tax ID. All of this lives in a single Payment Details modal on the Billing page. Editing it takes seconds, applies to your next invoice (past invoices are immutable), and is the only place to swap the card on file too.
The Billing page at a glance
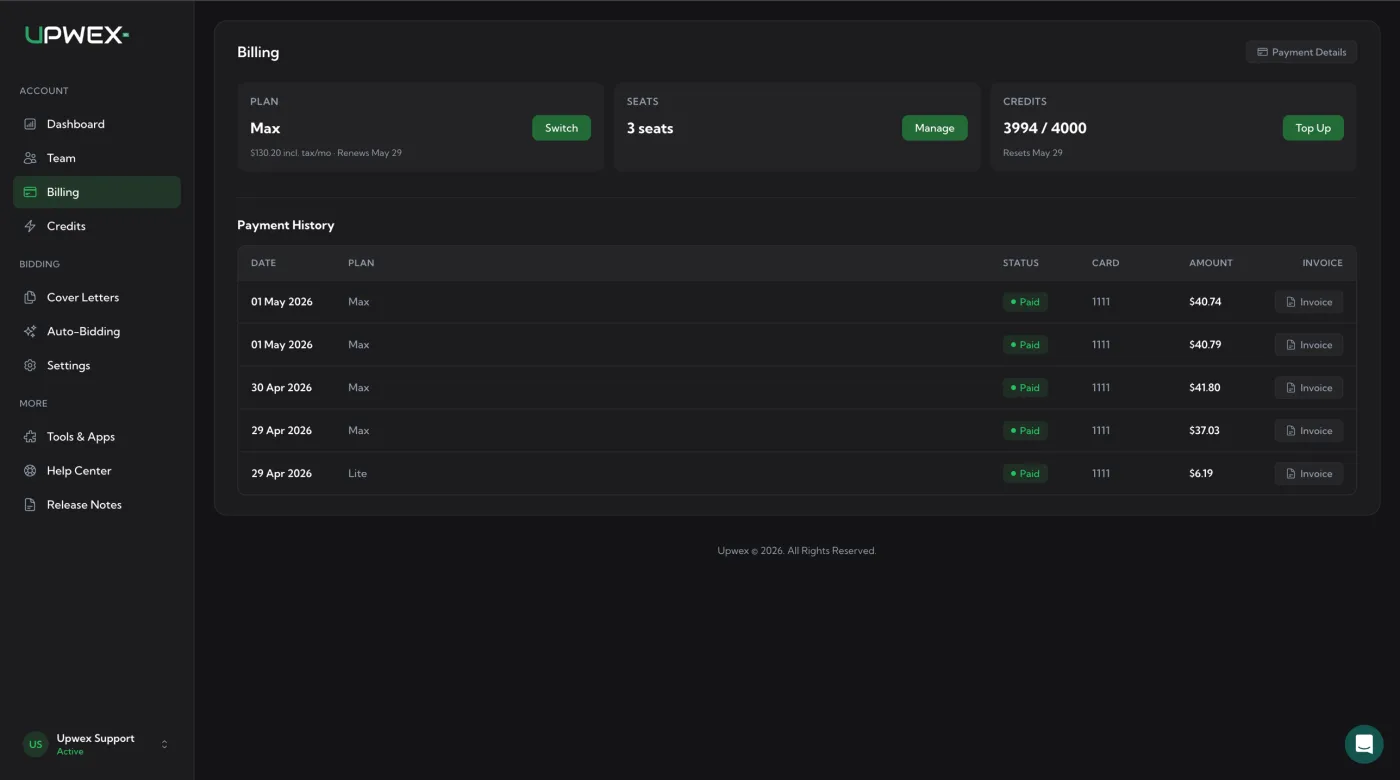
Open account.upwex.io/billing from the sidebar (Account → Billing). The header has a single button – Payment Details – and three hero cards summarising your subscription:
- PLAN – your active tier (Lite / Pro / Max), the per-cycle total incl. tax, and the next renewal date. Button: Switch (opens the Pricing Plans page where you can upgrade, downgrade, or change billing cycle).
- SEATS – how many paid seats your team has. Button: Manage (opens the Team page where you can invite, remove, or reassign seats).
- CREDITS – current AI credit balance vs. monthly allowance, with the credit-pool reset date. Button: Top Up (opens the credit-pack purchase modal).
Below the hero – the Payment History table with all your past invoices: date, plan name, status, last 4 digits of the card, amount, and an Invoice button to download the PDF.
Renews vs Resets
You’ll often see “Renews May 29” on the PLAN card and “Resets May 29” on the CREDITS card on the same date – that’s normal. But they come from different sources and can drift apart:
- Renews – pulled from your Stripe subscription’s
current_period_end– the date the next plan invoice fires. - Resets – pulled from your AI Credit pool’s
credits_reset_at– the date the plan-credits bucket refills.
If you change plans mid-cycle, these two dates can move independently for a billing cycle before realigning.
Open the Payment Details modal
Click Payment Details in the top-right of the Billing page. The modal that opens has two sections – CARD and BILLING DETAILS.
Empty state – first time
If you haven’t entered any details yet (e.g. fresh trial account, no card added), the modal looks like this:
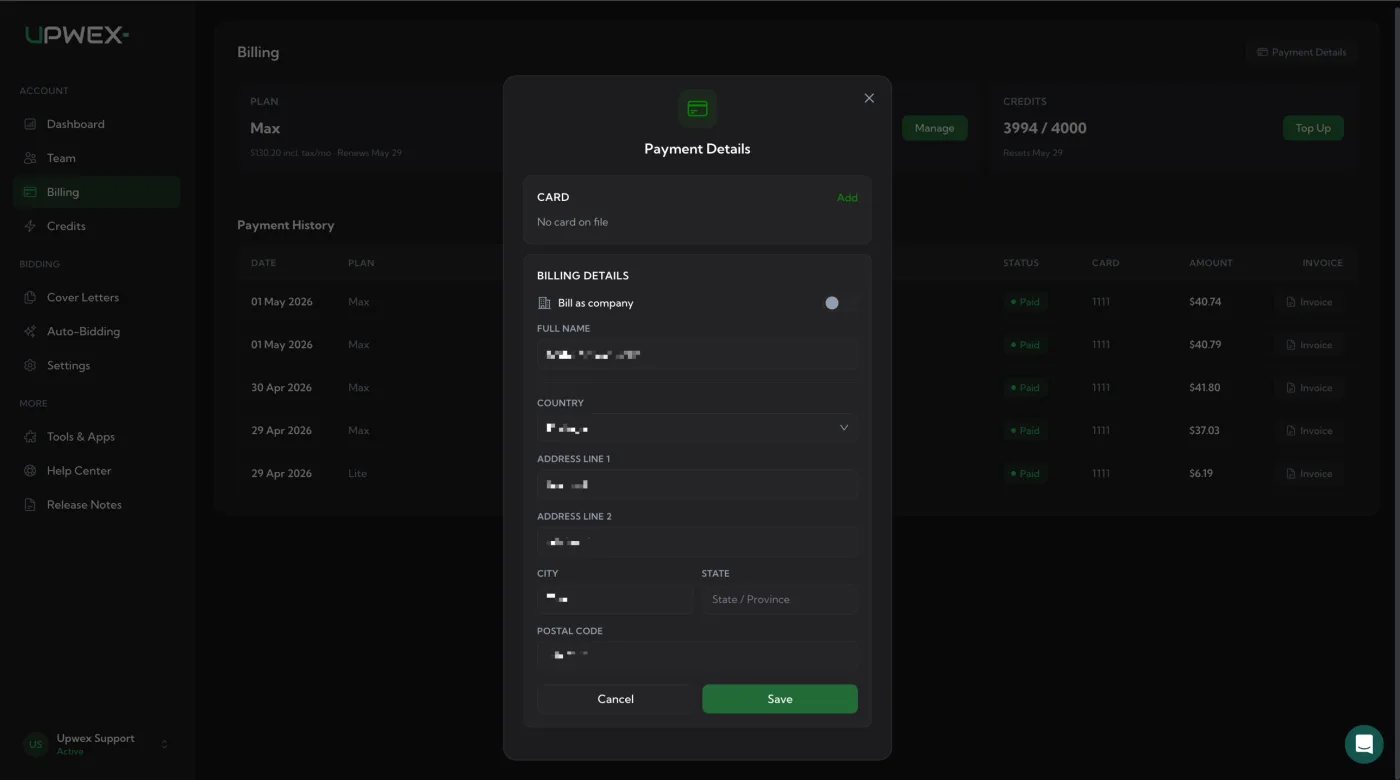
- CARD – “No card on file” with a green Add link in the top-right.
- BILLING DETAILS – empty form with a Bill as company toggle (off) and the personal-billing fields below.
Filled state – after first save
Once you’ve added a card and saved billing details, the modal switches to a compact summary view:
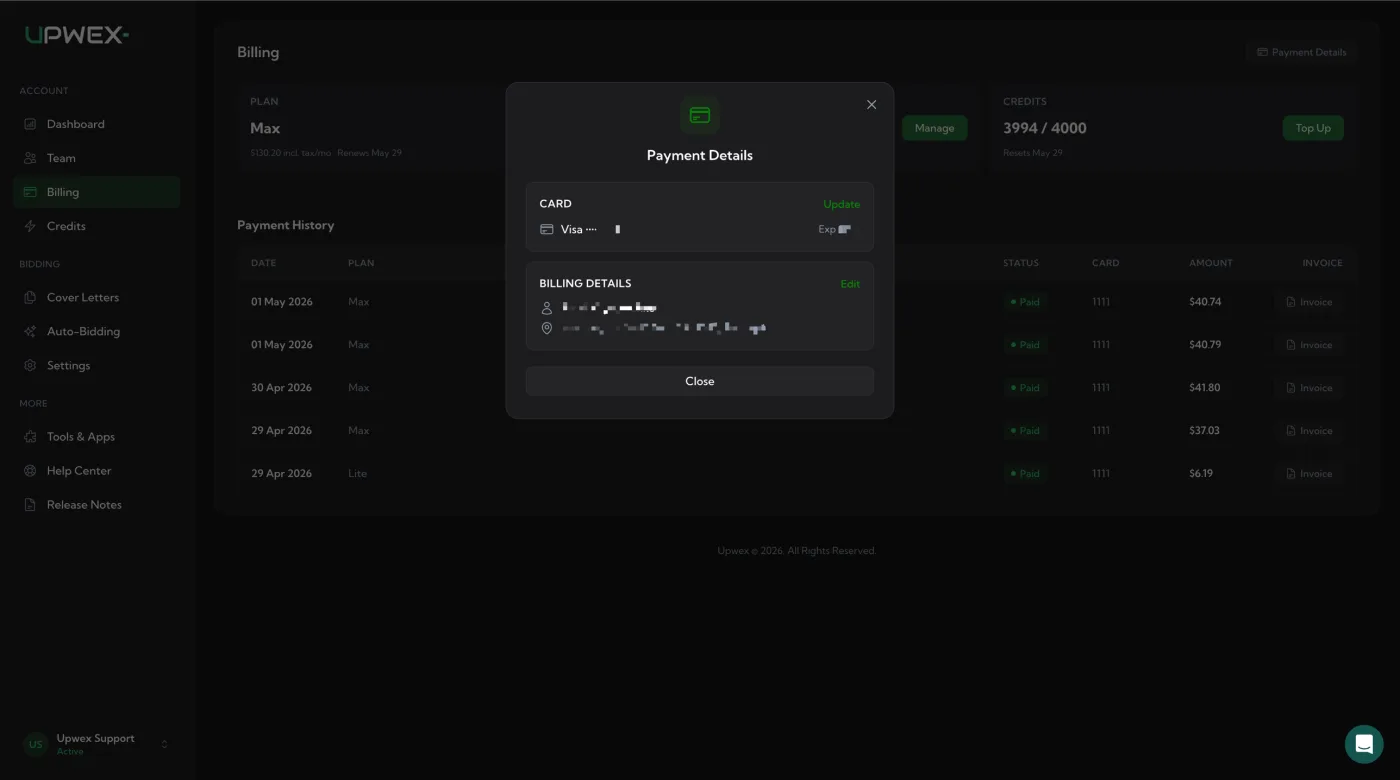
- CARD – Visa **** [last 4] with the Exp [MM/YY], and a green Update link to swap the card.
- BILLING DETAILS – name (with person icon) and address (with map-pin icon) on two lines, plus a green Edit link to change them.
The Save button is replaced by Close in this state – saved data isn’t editable until you click Update or Edit, which switch the relevant section back into form mode.
Adding or updating the card
Click Add (empty state) or Update (filled state). The CARD section expands to an inline Stripe card form – card number, MM/YY, CVC, ZIP. We don’t redirect you anywhere: this is Stripe Elements rendered in-modal, so your card data goes straight to Stripe and never touches the Upwex backend.
- Type or paste the card details.
- Click Save Card.
- Stripe validates and creates a SetupIntent (3D Secure prompt may appear for some cards/regions).
- On success – the card becomes your default payment method for the subscription, top-ups, and any future plan upgrades. The CARD section collapses back to the summary view (Visa **** XXXX).
If the card is declined or fails 3D Secure, the form stays open with an inline error from Stripe. Try a different card or contact your bank.
Editing billing details
Click Edit (filled state) or fill in the empty form (empty state). All fields persist to your Stripe customer record and appear on every future invoice.
Personal billing (Bill as company toggle OFF)
- Full Name – your legal name as it should appear on invoices.
- Country – full ISO list of 195+ countries; pick yours.
- Address Line 1 / Address Line 2 – street address.
- City.
- State / Province – for US and Canada this is a sub-dropdown of states/provinces; for everywhere else it’s a freeform text field.
- Postal Code.
Company billing (Bill as company toggle ON)
Flip the Bill as company toggle to ON. The Full Name field is replaced by:
- Company Name – appears on every invoice (e.g. Acme GmbH).
- Tax ID – your VAT / EIN / Tax Number. Format example: DE123456789 (Germany), GB123456789 (UK), 123-45-6789 (US EIN). Optional – leave blank if you don’t have one.
The address fields below are unchanged.
How the Tax ID gets validated
Upwex doesn’t try to validate your VAT format on the frontend. When you click Save, the Tax ID is sent to Stripe along with your country, and Stripe figures out the rest:
- Type is auto-resolved from your country. Germany / France / Italy / etc. →
eu_vat; UK →gb_vat; US →us_ein; Canada →ca_bn; etc. You don’t pick the type yourself – the modal hint “Type is determined automatically from your country” says so. - Format and existence are validated by Stripe. EU VAT IDs are checked against VIES (the official EU registry). Other regions go through their respective tax-authority APIs.
- If the Tax ID is rejected – Stripe returns an error and the modal shows the exact reason inline (“VAT number is not valid”, “Format does not match”, etc.). Fix and re-save.
- If the Tax ID is accepted – it’s saved to your Stripe customer record and printed on every future invoice.
EU VAT reverse-charge
If you save a valid EU VAT ID (and your country is in the EU), Stripe automatically applies the reverse-charge mechanism on your invoices:
- Future invoices show 0% VAT with a “VAT reverse charge – recipient liable” note.
- You handle VAT on your side via your local return.
- The incl. tax/mo total on the PLAN card drops accordingly the next time the page refreshes.
Without a valid VAT ID, EU customers are charged the local VAT rate (Stripe Tax computes it from your country). Non-EU customers (e.g. US, UK post-Brexit, India) follow their own tax rules – sales tax, GST, etc., depending on jurisdiction.
Where the saved details show up
- Invoice PDFs (Payment History → Invoice button) – your name/company, address, country, Tax ID, and the applied tax (or reverse-charge note) all appear on every PDF.
- Stripe receipt emails – sent to the email on your account after every successful charge; they include the same data and a link to the hosted PDF copy.
- Inside Upwex – only the read-only summary in the Payment Details modal. Nowhere else.
Exporting all your invoices for accounting? Open Payment History, click Invoice on each row to download the PDF – they have everything finance needs.
Mid-cycle changes
Editing your billing details is not retroactive. Past invoices are immutable artefacts (a regulatory requirement for invoices in most jurisdictions) – Upwex won’t reissue them with corrected data, and Stripe doesn’t either.
- Edits take effect on the next invoice Stripe generates.
- If you spotted a mistake on an already-issued invoice and need a corrected one for accounting – contact support with the invoice number; we can issue a credit note + new invoice if the regulatory window is still open.
Who can edit billing details
Owner and Admin roles only. The Billing page itself is hidden from Members in the sidebar – they can’t open it. The backend enforces the same gate (Members get a 403 if they try to call the billing API directly), so there’s no way to bypass.
If you need to update billing details and you’re a Member – ask the team Owner or any Admin to do it on your behalf.
Related articles
- Pricing plans overview – what each plan tier costs and how Yearly billing works
- Upgrade, downgrade or switch plans – proration on plan changes (the Tax line on those modals depends on this Billing Info)
- Top up AI Credits – top-up invoices use the same billing data and tax setup
- Cancel your subscription – what happens to billing data after cancellation